Sunday, January 26, 2025

Vintage Wood Signage Collection

A Connoisseur's Guide to the Vintage Wood Signage Collection

The allure of vintage wood signage transcends mere aesthetics; it represents a tangible connection to bygone eras, a whisper of historical narratives etched into weathered wood. This collection, meticulously curated over decades, showcases the artistry and craftsmanship of a bygone age, offering a captivating glimpse into the evolution of advertising and graphic design. Each piece tells a unique story, a testament to the enduring power of handcrafted signage in a world increasingly dominated by digital displays.

The Allure of Aged Wood and Hand-Painted Lettering

The inherent charm of vintage wood signage lies in the interplay of material and message. The wood itself, often exhibiting the patina of age, speaks volumes. Scratches, dents, and faded paint bear witness to the passage of time, adding character and authenticity that mass-produced replicas cannot replicate. The hand-painted lettering, often executed with painstaking precision, reflects a dedication to craftsmanship now largely lost. These signs weren't simply advertisements; they were works of art, meticulously crafted to capture attention and convey a message with undeniable visual impact.

The Materiality of Time: Wood as a Medium

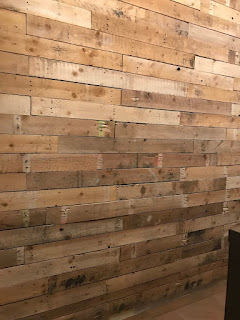
The choice of wood itself played a significant role in the longevity and character of these signs. Different species, from durable hardwoods like oak and pine to softer woods like poplar, imparted unique textural and tonal qualities. The grain of the wood, its natural variations in color and texture, often became an integral part of the overall design. The aging process, involving exposure to the elements, further enhanced the visual appeal, creating a rich tapestry of color and texture that contemporary materials simply cannot match. The weathering, fading, and cracking of the paint only serve to deepen the historical significance and aesthetic appeal of each piece.

The Artistry of Hand-Lettering: A Lost Art

The hand-painted lettering found on vintage wood signs represents a lost art form, a testament to the skill and precision of sign painters of the past. These artisans weren't simply applying paint to wood; they were crafting visual narratives, utilizing various techniques to create depth, dimension, and visual impact. The careful selection of fonts, the precise application of paint, and the mastery of shading and highlighting all contributed to the unique character of each sign. The letters themselves, often meticulously crafted with individual brushstrokes, possess a dynamism and personality impossible to replicate through digital printing.

Categorizing the Collection: A Diverse Tapestry of Styles and Eras

This collection encompasses a diverse range of styles and eras, reflecting the evolution of advertising and design throughout the 20th century. From the bold Art Deco aesthetics of the 1920s and 30s to the minimalist designs of mid-century modernism, each piece represents a specific moment in time, capturing the cultural and aesthetic sensibilities of its era. The sheer variety of subjects, from commercial advertisements for local businesses to directional signage for public spaces, underscores the pervasive role of wood signs in everyday life.

Early 20th Century: The Era of Ornate Detail

The early 20th-century pieces within this collection are characterized by their ornate detailing and richly saturated colors. These signs often feature elaborate flourishes, decorative borders, and meticulously crafted lettering, reflecting the artistic exuberance of the era. The use of bold colors and contrasting shades further enhanced the visual impact, ensuring that the message was conveyed with undeniable clarity and style. These signs represent a time when advertising was a form of artistic expression, a testament to the creativity and craftsmanship of the period.

Mid-Century Modern: Simplicity and Elegance

The mid-century modern signs in this collection showcase a stark contrast to their earlier counterparts. Characterized by clean lines, geometric shapes, and a minimalist aesthetic, these signs reflect the design philosophy of the era. The emphasis is on simplicity and functionality, with the message conveyed in a clear and concise manner. The color palette is often muted, with a preference for earth tones and subdued hues. These signs represent a shift in design sensibilities, a move away from ornate decoration towards a more streamlined and functional aesthetic.

Late 20th Century: The Transition to New Materials

The late 20th-century signs within the collection represent a transition period, marking the gradual shift away from wood as the primary material for signage. The introduction of new materials, such as plastic and metal, challenged the dominance of wood, leading to a decline in the production of hand-painted wood signs. These later pieces often reflect a blend of traditional and modern design elements, showcasing the lingering influence of craftsmanship alongside the emergence of new manufacturing techniques. They provide a fascinating glimpse into the twilight years of a traditional craft.

Preservation and Conservation: Ensuring the Legacy of these Artifacts

The preservation and conservation of vintage wood signage is paramount to ensuring the survival of these irreplaceable artifacts. These signs are not simply decorative objects; they are tangible links to the past, offering valuable insights into the history of advertising, graphic design, and craftsmanship. Careful handling, proper storage, and periodic restoration are essential to maintaining their integrity and ensuring their continued existence for generations to come.

Challenges in Preservation

Several factors threaten the longevity of vintage wood signage. Exposure to the elements, such as moisture, sunlight, and extreme temperatures, can cause significant damage. Insect infestation, wood rot, and paint degradation are also common challenges. The delicate nature of the hand-painted lettering requires special attention, as any attempt at restoration must be undertaken with extreme care to avoid further damage.

Methods of Conservation

The conservation of vintage wood signage involves a multi-faceted approach. This includes careful cleaning, using appropriate solvents and techniques to remove dirt and grime without harming the paint. Stabilization of the wood itself is crucial, addressing any signs of rot or insect damage. Paint restoration, if necessary, should be undertaken by skilled professionals, using conservation-grade materials that will not further compromise the integrity of the original artwork. Proper storage, in a climate-controlled environment, is also essential in mitigating the effects of environmental factors.

In conclusion, this vintage wood signage collection stands as a remarkable testament to the artistry and craftsmanship of a bygone era. Each piece, with its unique history and aesthetic appeal, offers a fascinating glimpse into the evolution of advertising and design, reminding us of the enduring power of handcrafted objects in a world increasingly dominated by mass-produced goods. The preservation and careful study of these artifacts are vital in ensuring that their stories continue to resonate for generations to come.

Continue reading

Vintage Pallet Wood Wall Decor

Unlocking the Rustic Charm: Vintage Pallet Wood Wall Decor

Hey there, fellow DIY enthusiasts and home décor lovers! Let's talk about something I'm seriously obsessed with lately: vintage pallet wood wall décor. There's just something so uniquely appealing about repurposing old, weathered wood into beautiful, one-of-a-kind pieces for your home. It’s sustainable, stylish, and lets you unleash your inner artist â€" win, win, win!

Why Choose Pallet Wood?

Before we dive into the fun stuff, let's talk about why pallet wood is such a fantastic material for DIY projects. First off, it's sustainable. Instead of ending up in a landfill, these reclaimed pieces get a new life, adding character and charm to your home. Plus, it's usually pretty affordable, or even free if you know where to look (more on that later!). The naturally distressed look of old wood is gorgeous; it gives off this amazing rustic vibe that's hard to replicate with other materials.

The variety in the wood itself is another huge plus. You’ll find different shades, textures, and even stamps and markings on the wood, adding to the unique character of each piece. Each pallet tells a story - imagine the journeys those boards have been on! It's like adding a piece of history to your walls.

Sourcing Your Pallet Wood Treasure

Now, the exciting part: finding your pallet wood! This can be an adventure in itself. Here are a few places to look:

  • Construction sites: Many construction sites have pallets they are discarding. Always ask for permission before taking any wood.
  • Local businesses: Think grocery stores, hardware stores, or even breweries. They often receive shipments on pallets and might be happy to let you take some off their hands.
  • Online marketplaces: Websites like Craigslist or Facebook Marketplace can be great for finding pallets near you, often for free or a very low price.
  • Recycling centers: Check with your local recycling center; they may have pallets available for reuse.

Important note: Always make sure you're getting pallets that are heat-treated and stamped with the IPPC stamp (HT). This ensures the wood is free of pests and safe for indoor use. Avoid using chemically treated pallets unless you're knowledgeable about how to properly handle them.

Cleaning and Preparing Your Pallet Wood

Once you've scored your pallets, it's time to get them ready for your project. This involves a bit of cleaning and prep work:

Cleaning the Palettes

First things first: a good cleaning! Pallet wood can be quite dirty, so you'll want to give it a thorough scrub. Use a stiff brush, soapy water, and maybe even a pressure washer (if you have one) to remove dirt, grime, and any loose debris. Let it dry completely before moving on.

Removing Nails and Staples

This step is crucial for safety! Pallet wood is often held together with nails and staples, some of which can be rusty and sharp. Use a hammer and nail puller or a pry bar to carefully remove all nails and staples. Wear gloves to protect your hands!

Sanding for a Smooth Finish

Sanding is essential for creating a smooth surface for painting or staining. Start with coarser sandpaper (around 80-grit) to remove any rough spots, then move to finer sandpaper (120-grit or higher) for a smoother finish. Sanding can also help to even out the color of the wood.

DIY Pallet Wood Wall Decor Ideas

Now for the fun part â€" the creative possibilities are endless! Here are some ideas to get your imagination flowing:

Rustic Shelves

Create simple shelves by attaching a few reclaimed pallet boards together. You can stain or paint them to match your existing décor. These shelves are perfect for displaying plants, books, or decorative items.

Wall Art

Use individual pieces of pallet wood to create unique wall art. You can paint them, stain them, or leave them natural. Get creative with arrangements, shapes, and colors!

Headboard

A pallet headboard is a fantastic way to add a rustic touch to your bedroom. You can paint it, stain it, or leave it natural. Add some comfy cushions and pillows, and you have a truly unique headboard.

Vertical Garden

Turn a pallet into a vertical garden! Add small pots or planters to the gaps between the boards and plant your favorite herbs, flowers, or succulents. It's a beautiful and functional way to bring nature indoors.

Mirror Frame

Create a unique frame for your mirror using pallet wood. You can paint it to match your bathroom or bedroom décor, or leave it natural for a rustic look.

Finishing Touches and Protection

Once your project is assembled, don’t forget the finishing touches! A coat of paint, stain, or sealant will protect your beautiful creation from the elements (even inside!) and enhance its natural beauty. Consider using a sealant to protect it from moisture and prevent warping.

Commonly Asked Questions

Q: Is pallet wood safe for indoor use?

A: Yes, as long as it's heat-treated and stamped with the IPPC stamp (HT). This indicates that the wood has been treated to eliminate pests and is safe for indoor use.

Q: How do I clean pallet wood effectively?

A: A good scrub with soap and water is a great start. A pressure washer can be helpful for stubborn dirt. Make sure to let it dry thoroughly before proceeding.

Q: What kind of paint or stain should I use on pallet wood?

A: You can use any type of paint or stain suitable for wood. Choose a finish that matches your desired aesthetic. A sealant is recommended to protect the wood and enhance its longevity.

Q: Where can I find free pallets?

A: Check with local businesses, construction sites (always ask permission!), and online marketplaces. Be sure to check for the heat-treated stamp!

Q: Are there any safety precautions I should take when working with pallet wood?

A: Always wear gloves when handling pallet wood to avoid splinters and rusty nails. Carefully remove all nails and staples before sanding or painting.

So there you have it! I hope this inspires you to unleash your creativity and create some stunning vintage pallet wood wall décor. Happy crafting!

Continue reading

DIY Pallet Platform Bed

Build Your Dream: A DIY Pallet Platform Bed

Tired of overpriced store-bought beds? Yearning for a rustic, unique centerpiece for your bedroom? Then prepare to unleash your inner builder! This guide walks you through creating a stunning and surprisingly affordable pallet platform bed. Forget the hefty price tags and embrace the satisfaction of crafting a beautiful, functional piece yourself. We'll cover everything from sourcing materials to the final touches, making this project achievable even for novice DIYers. Get ready to transform your bedroom and your weekend!

Gathering Your Materials: The Foundation of Your Project

Before you grab your hammer, let's ensure you have all the necessary components. The beauty of this project lies in its simplicity â€" the main ingredient is, of course, reclaimed pallets! Source these from construction sites, landscaping companies, or even your local recycling center. Inspect each pallet carefully; choose sturdy ones free from significant damage, rot, or protruding nails. You'll likely need two to three pallets, depending on the desired bed size. Beyond the pallets, gather these essential supplies:

  • Safety glasses
  • Work gloves
  • Hammer
  • Pry bar (for separating pallet boards)
  • Screwdriver (or drill with screwdriver bits)
  • Wood screws (various lengths, depending on pallet thickness)
  • Sandpaper (various grits)
  • Wood filler (to fill nail holes and gaps)
  • Primer
  • Paint or stain (your choice!)
  • Measuring tape
  • Level
  • Optional: Mattress support slats or a plywood sheet for added stability.

Remember, the quality of your materials directly impacts the final product. Invest time in finding robust pallets and high-quality finishing supplies for a bed that will last.

Preparing the Pallets: Safety First, then Beauty

Safety Precautions: Protecting Yourself

Safety is paramount! Before you begin dismantling pallets, wear safety glasses and work gloves. Pallet wood often contains hidden nails and splinters. Carefully inspect each board and use a pry bar to separate them gently, avoiding sudden movements that could cause injury.

Cleaning and Repairing the Boards

Once you've separated the boards, it's time for a thorough cleaning. Use a stiff brush to remove dirt, debris, and loose paint. Sand each board with varying grits of sandpaper, starting with a coarser grit to remove imperfections, then finishing with a finer grit for a smooth surface. Fill any holes or cracks with wood filler, allowing it to dry completely before sanding again.

Assembling Your Pallet Platform Bed: Building Your Masterpiece

Now for the fun part! Lay out your prepared boards to create the desired bed frame size. Use your measuring tape to ensure everything is square and even. Once satisfied with the arrangement, begin screwing the boards together. Use longer screws for added stability and pre-drill pilot holes to prevent the wood from splitting. Remember to check your work with a level to guarantee a perfectly flat and sturdy frame.

Adding Support: For a Rock-Solid Bed

While many people find the rustic look of a simple pallet platform sufficient, adding extra support can enhance durability and comfort. Consider laying down plywood across the frame, creating a solid base for your mattress. Alternatively, you can install slats for airflow and mattress support. This step significantly improves the longevity and comfort of your bed.

Finishing Touches: Adding Personal Flair

With your frame assembled and stable, it's time to add your personal touch! Apply a coat of primer to prepare the wood for paint or stain. Choose a finish that complements your bedroom decor; you could go for a bold, vibrant color, a rustic stain, or even a clear sealant to showcase the natural wood grain. Let the finish dry completely before carefully placing your mattress.

Congratulations! You've successfully built your own unique, stylish, and budget-friendly pallet platform bed. Enjoy the fruits of your labor and the pride of crafting a beautiful piece for your home.

Continue reading

Wednesday, January 22, 2025

How to make a cabinet with free woodworking instructions

Constructing a Basic Cabinet: A Comprehensive Guide for the Aspiring Woodworker

This guide provides a detailed, step-by-step approach to building a simple, yet functional, cabinet. While requiring basic woodworking skills and tools, this project offers a rewarding experience for both beginners and intermediate woodworkers. The emphasis is on clarity and precision, ensuring a successful outcome. All dimensions provided are illustrative and can be adapted to suit individual needs and preferences. Remember to always prioritize safety and utilize appropriate personal protective equipment (PPE) throughout the process.

I. Planning and Material Selection

Before commencing the construction, careful planning is crucial. This phase involves determining the desired cabinet dimensions, selecting appropriate materials, and creating a detailed cut list.

A. Determining Cabinet Dimensions

The dimensions of your cabinet will be determined by its intended purpose and location. Consider factors such as available space, the items to be stored, and overall aesthetic appeal. For this guide, we will assume a cabinet with the following approximate dimensions: Height: 36 inches, Width: 30 inches, Depth: 12 inches. However, adjust these measurements as needed.

B. Material Selection

The choice of wood significantly impacts the final product's durability, appearance, and cost. Common choices include pine, plywood, and hardwood species such as oak or maple. For this project, plywood is recommended due to its cost-effectiveness, stability, and readily available standard sizes. Choose a thickness appropriate for the cabinet's intended use; ¾-inch plywood is a suitable choice for most applications. You will also require wood glue, wood screws, and wood finish (e.g., paint, stain, varnish).

C. Creating a Cut List

Once the cabinet dimensions are finalized, create a precise cut list specifying the dimensions of each component. This will minimize material waste and ensure an accurate construction. A sample cut list for our example cabinet (using ¾-inch plywood) might include:

  • Two side panels: 36 inches x 12 inches
  • One top panel: 30 inches x 12 inches
  • One bottom panel: 30 inches x 12 inches
  • Two shelf supports (optional): 28 inches x 2 inches
  • Two back panels (can be constructed from thinner material): 30 inches x 36 inches
  • Shelf (optional): 28 inches x 10 inches

Remember to adjust these dimensions based on your chosen cabinet size and desired shelf configurations. Consider adding extra material to account for potential errors or adjustments.

II. Cutting and Assembling the Cabinet Frame

This section details the process of cutting the plywood panels to the specified dimensions and assembling the cabinet frame.

A. Cutting the Plywood

Using a circular saw, jigsaw, or table saw, carefully cut the plywood panels according to your cut list. Ensure accurate and square cuts for optimal assembly. Consider using a miter saw for increased precision, particularly for angled cuts if you plan on designing more advanced cabinet features.

B. Assembling the Sides and Bottom

Apply a liberal amount of wood glue to the edges of the side panels and the bottom panel. Clamp the components together firmly, ensuring square alignment. Use appropriate clamps to maintain pressure and prevent warping during the glue drying process. Allow the glue to dry completely, as per the manufacturer’s instructions, typically for at least 24 hours.

C. Attaching the Top Panel

Once the side and bottom assembly is securely dried, attach the top panel using wood glue and screws. Pre-drill pilot holes to prevent the wood from splitting. Use screws of appropriate length and diameter to ensure sufficient strength and stability. Again, clamp firmly until the glue has dried completely.

D. Adding Shelf Supports (Optional)

If you are including shelves, attach the shelf supports to the inside of the side panels at the desired height. Use wood glue and screws for a secure and stable attachment. Ensure the supports are level and plumb to maintain the shelf's stability.

III. Adding the Back Panel and Shelves

Completing the cabinet involves attaching the back panel and installing shelves.

A. Attaching the Back Panel

The back panel can be made of thinner plywood or even hardboard. Attach it to the back of the cabinet frame using small nails or staples. Ensure that it is flush with the frame and securely fastened.

B. Installing Shelves (Optional)

Insert the shelves onto the shelf supports. You can use shelf pins or simply rest them on the supports, depending on the weight of the items to be stored. Ensure the shelves are level and securely in place.

IV. Finishing Touches

This stage involves sanding, applying a finish, and adding any desired hardware.

A. Sanding

Sand all surfaces smooth using progressively finer grit sandpaper. Start with a coarser grit (e.g., 80-grit) to remove any imperfections and gradually move to finer grits (e.g., 120-grit, then 220-grit) to achieve a smooth finish. Pay particular attention to edges and corners.

B. Applying a Finish

Apply your chosen finish â€" paint, stain, or varnish â€" according to the manufacturer’s instructions. Multiple coats may be necessary for optimal protection and appearance. Allow sufficient drying time between coats.

C. Adding Hardware (Optional)

Install any desired hardware, such as knobs, handles, or hinges. Ensure the hardware is securely fastened and aligns correctly.

By following these detailed steps, you can successfully construct a functional and aesthetically pleasing cabinet. Remember that precision and patience are key to achieving a high-quality result. Enjoy the process and the satisfaction of creating something with your own hands.

Continue reading

Rustic country woodworking plans for cozy interiors

Rustic Country Woodworking Plans for Cozy Interiors

Transform your home into a haven of rustic charm with handcrafted woodworking projects. These detailed plans offer a blend of practicality and beauty, perfect for adding a cozy touch to any interior. Forget mass-produced furniture; embrace the warmth and character of handcrafted pieces that tell a story. This article provides inspiring ideas and actionable steps to get you started on your rustic country woodworking journey.

Crafting a Charming Coffee Table

A rustic coffee table anchors a living room, providing both functionality and visual appeal. Consider using reclaimed wood, such as old barn beams or weathered pallets, to infuse the piece with history. The uneven texture and rich tones of reclaimed wood add undeniable character. We’ll build a sturdy, simple design that showcases the natural beauty of the wood.

Materials You'll Need:

Gather your materials before you begin. You'll need approximately eight to ten reclaimed wood planks of varying lengths and widths (aim for a thickness of at least 1.5 inches for durability). Ensure the wood is clean and dry. You’ll also need wood glue, wood screws, a drill, a saw (circular saw or hand saw), sandpaper, and a wood finish of your choice (such as a clear varnish or stain). Don't forget safety glasses and ear protection!

Construction Steps:

Begin by arranging the planks to create the desired table shape and size. Experiment with different arrangements before committing to a final layout. Once satisfied, secure the planks together using wood glue and wood screws, ensuring the screws are countersunk and hidden. Sand the entire surface smooth, paying attention to the edges. Finally, apply your chosen wood finish, following the manufacturer’s instructions. This allows the wood's natural beauty to shine through.

Building Rustic Shelves for Added Storage

Maximize storage space while enhancing your room's aesthetic with handcrafted shelves. These shelves can be installed in any roomâ€"from the living room to the kitchenâ€"to hold books, plants, or decorative items. A simple, floating shelf design provides a clean, modern look while retaining the rustic charm of the wood.

Designing for Functionality and Style:

Consider the space where you’ll place the shelves. Measure carefully and plan the shelf placement accordingly. Choose wood that complements your existing décor. You can use the same type of reclaimed wood as your coffee table for a cohesive look, or experiment with different wood types to add visual interest. The shelves' design should blend seamlessly into the room's overall feel.

Essential Tools and Materials:

  • Reclaimed or new wood boards (adjust quantity based on desired shelf size and number of shelves).
  • Wood screws.
  • Wall anchors (appropriate for your wall type).
  • Drill with drill bits.
  • Level.
  • Measuring tape.
  • Pencil.
  • Sandpaper.
  • Wood stain or finish (optional).
  • Remember to always consult a professional if you are unsure about any aspect of installation, particularly when dealing with load-bearing walls.

    Creating a Cozy Rustic Wall Decor Piece

    Add a personal touch to your walls with a rustic wall hanging. This can be as simple as a decorative wooden sign or a more intricate piece incorporating various woodworking techniques. This project allows for maximum creativity and personalization. Let your imagination run wild!

    From simple designs to more complex projects, these plans encourage you to embrace the rustic charm of handcrafted pieces. Start small, gain confidence, and enjoy the satisfaction of creating beautiful, functional items for your home.

    Continue reading

    Customizable 16x20 pergola plans for unique designs

    Craft Your Dream Escape: Customizable 16x20 Pergola Plans

    Dreaming of a stunning outdoor haven? A pergola offers the perfect blend of shade, style, and functionality, transforming your backyard into a personal oasis. But generic designs lack the character to truly reflect your vision. This guide empowers you to design and build a unique 16x20 pergola, tailored perfectly to your needs and aesthetic preferences. We'll delve into customizable elements, construction considerations, and the rewarding journey of creating a truly bespoke structure.

    Unleashing Your Creativity: Customizable Design Elements

    Forget cookie-cutter designs! A 16x20 pergola provides ample space to experiment with various features, letting your personality shine through. Consider these key customizable aspects:

    Post Styles and Materials

    Start by selecting the perfect posts. Traditional 4x4 pressure-treated lumber offers affordability and durability. However, for a more upscale look, explore cedar or redwood for their natural beauty and resistance to rot. You can even enhance the aesthetic further by incorporating decorative post caps, creating a stunning crown to your pergola's pillars. Think beyond simple square postsâ€"consider round posts for a softer, more romantic feel, or even utilize reclaimed timbers for a rustic charm.

    Roof Design: Shade and Style

    The roof is where you can truly showcase your creativity. A simple flat roof offers clean lines and easy construction, while a more complex gable or hip roof adds architectural flair. Explore different materials as well. Traditional lattice offers dappled shade and a classic look. However, you can substitute this with solid wood planks for complete shade, or even integrate polycarbonate panels for a modern touch that also provides better weather protection.

    Adding Personality: Decorative Touches

    Don't stop at the basics! Personalize your pergola with thoughtful additions. Climbing plants can transform the structure over time, weaving a living tapestry of vibrant green. String lights create a magical ambiance for evening gatherings. Built-in seating or a fire pit can make your pergola a truly versatile gathering space. The possibilities are endless, limited only by your imagination!

    Building Your Vision: Construction Considerations

    With your design finalized, it's time to transition to the construction phase. Proper planning is paramount for a successful project. This includes:

    Site Preparation: A Solid Foundation

    Begin by carefully leveling the ground and ensuring a stable foundation. Concrete footings are recommended for long-term durability, especially in areas with fluctuating temperatures or potential frost heave. Accurately measuring and marking the post locations is crucial for a square and structurally sound pergola.

    Material Selection and Cutting

    Choose high-quality materials that meet your design and budget. Precisely cut all lumber according to your plans to ensure a perfect fit. Utilizing a miter saw and a sturdy work surface is essential for accurate cuts and maintaining safety throughout the construction process.

    Assembly and Finishing Touches

    Assemble the pergola following your chosen plans, paying close attention to detail and ensuring proper alignment at each stage. Once the structure is complete, consider adding a protective finish, such as stain or sealant, to enhance its durability and beauty. This will protect your pergola from the elements and extend its lifespan for years to come.

    Building a customizable 16x20 pergola is a rewarding undertaking. By thoughtfully considering design elements, selecting quality materials, and carefully following construction best practices, you can craft an outdoor space that reflects your unique style and enhances your enjoyment of your backyard for years to come. Embrace the process, enjoy the creativity, and create your dream escape!

    Continue reading

    Step-by-step guide to floating shelf construction for any space

    Building Your Dream Floating Shelves: A Step-by-Step Guide

    So, you're ready to ditch the bulky bookcases and embrace the sleek, modern look of floating shelves? Fantastic! Floating shelves are a fantastic way to add storage and style to any room, from a minimalist living room to a cozy bedroom. But don't worry if you're not a DIY whiz â€" building them is easier than you think! This guide will walk you through the entire process, step-by-step, so you can confidently create beautiful shelves for your space. Grab your tools, let's get started!

    1. Planning and Preparation: The Foundation of a Great Shelf

    Before you even think about touching a saw, you need a plan! This isn't rocket science, but a little forethought will save you headaches down the line.

    1.1 Choosing Your Shelf Style and Materials

    First, envision your perfect shelf. Do you want a rustic look, something sleek and modern, or maybe a touch of industrial chic? This will dictate your material choices. Popular options include:

    • Wood: Pine, oak, and maple are all great choices, offering varying levels of durability and aesthetic appeal. Consider the finish â€" stained, painted, or natural?
    • MDF (Medium-Density Fiberboard): A more budget-friendly option that's easy to work with and can be painted or stained to match your décor.
    • Reclaimed wood: Adds a unique character and a touch of sustainability. Just be aware that it might require more prep work.

    Think about the size and number of shelves you need. How much weight will they hold? This will influence the thickness and type of wood (or other material) you choose. Measure your wall space carefully â€" you don't want to end up with shelves that are too big or too small.

    1.2 Gathering Your Tools and Materials

    Once you've decided on your design and materials, gather your tools. Having everything ready before you begin will make the process much smoother. You'll likely need:

    • Measuring tape and pencil: Essential for accurate measurements and marking.
    • Saw: A circular saw or miter saw will be easiest for cutting wood, but a hand saw will work for smaller projects.
    • Drill and drill bits: You'll need appropriate drill bits for your screws and pilot holes.
    • Screws: Choose screws that are appropriate for the thickness of your shelf and the type of wall you're attaching them to. Consider using drywall anchors for added security if necessary.
    • Level: Absolutely vital to ensure your shelves are straight!
    • Sandpaper: For smoothing out any rough edges on your wood.
    • Wood stain or paint (optional): To achieve your desired finish.
    • Safety glasses and hearing protection: Safety first!

    2. Building Your Shelves: From Raw Materials to Ready-to-Hang

    Now for the fun part! Let's construct those shelves.

    2.1 Cutting the Wood

    Using your measurements, carefully cut your wood to the desired size. If you're using a power saw, always remember safety first â€" wear safety glasses and make sure the area is clear. If you're unsure about using power tools, ask a friend for help or consider having the wood pre-cut at a home improvement store.

    2.2 Sanding and Finishing

    Once your wood is cut, sand down any rough edges or splinters. Start with coarser sandpaper and gradually move to finer grits to achieve a smooth finish. If you’re staining or painting your shelves, do this before attaching the brackets. Follow the manufacturer's instructions on your chosen stain or paint for best results. Let it dry completely before moving on.

    3. Mounting Your Shelves: The Final Stretch

    This is the moment of truth! Attaching your shelves securely is crucial for both safety and aesthetics.

    3.1 Locating Studs (Ideally)

    The most secure way to mount your shelves is to attach them directly to wall studs. Use a stud finder to locate the studs in your wall. Mark their locations clearly. If you can't mount directly to studs, you'll need to use appropriate wall anchors designed for the weight you'll be putting on the shelves.

    3.2 Attaching Brackets

    Most floating shelves use hidden brackets for a clean look. These brackets typically consist of two parts: one that attaches to the wall and another that attaches to the back of the shelf. Carefully follow the manufacturer's instructions for attaching the brackets. Use a level to ensure they are perfectly aligned before screwing them in securely.

    3.3 Attaching the Shelves to the Brackets

    Once the wall brackets are securely in place, carefully slide the shelves onto the brackets. Make sure they are level and stable before you let go! If your design requires visible brackets, attach them to the shelf and then mount the shelf-bracket combination to the wall. Again, always use a level and take your time. A little patience goes a long way for a nice, finished look!

    4. Adding the Finishing Touches

    You've done it! Your floating shelves are up. Now, it's time to add the finishing touches. This might include:

    • Adding a protective sealant: Especially useful for wood shelves, this will protect them from moisture and scratches.
    • Decorating your shelves: Arrange your books, plants, and decorative items to create a visually appealing display.
    • Adding lighting: Under-shelf lighting can add a touch of drama and highlight your display.

    Frequently Asked Questions

    Here are some common questions people have about building floating shelves:

    Q: What kind of screws should I use?

    A: The type of screw you need depends on the type of wall you have (drywall, concrete, etc.) and the weight you'll be placing on the shelf. Consult a hardware store professional for advice if you're unsure.

    Q: Can I build floating shelves without using studs?

    A: Yes, but you'll need to use heavy-duty wall anchors rated for the weight of your shelves and their contents. Always check the anchor's weight capacity before purchasing.

    Q: How do I ensure my shelves are level?

    A: Use a level at every stage of the process â€" when attaching brackets, when attaching the shelves to the brackets, and even after the shelves are fully installed. It's better to double-check than to have crooked shelves!

    Q: What if my shelves aren't perfectly level after installation?

    A: If the discrepancy is minimal, you might be able to shim the brackets with small pieces of wood or cardboard. For more significant issues, you may need to remove the shelves and start again. This is why careful measurement and leveling throughout the process are critical!

    Q: Can I use different materials for the shelf and the brackets?

    A: Yes, absolutely. For instance, you could use metal brackets with a wooden shelf, or even create brackets from wood to match your shelf. Your creativity sets the limits here!

    Building floating shelves is a rewarding project that can significantly enhance your home. With careful planning and attention to detail, you can create beautiful and functional storage solutions that you’ll be proud of. Now go forth and build!

    Continue reading

    DIY cantilever pergola plans for contemporary outdoor living

    Craft Your Dream: A DIY Cantilever Pergola for Modern Outdoor Living

    Transform your backyard into a stylish and functional oasis with a DIY cantilever pergola. This architectural marvel, characterized by its elegant, overhanging design, offers shade and a striking contemporary aesthetic without the need for bulky supporting posts in the center. This guide empowers you to build your own, providing detailed steps and crucial considerations for a successful project that perfectly complements your modern outdoor living space.

    Planning Your Cantilever Pergola: A Foundation of Success

    Before you grab your tools, meticulous planning is paramount. Start by determining the ideal location for your pergola. Consider the sun's path throughout the day to maximize shade and minimize harsh afternoon glare. Measure the space carefully, ensuring ample room for comfortable seating and movement underneath. Next, choose your materials wisely. Durable, weather-resistant lumber like cedar or redwood offers longevity and aesthetic appeal. For a truly modern feel, consider using composite decking materials for a low-maintenance option. Don't forget to check local building codes and obtain any necessary permits before you begin construction.

    Essential Design Considerations

    The cantilever design relies on a robust support system. Visualize the overall structure: the cantilevered beams extending from a strong wall or post. The length of the cantilever will dictate the material strength needed and the number of support beams. Consider the weight of the materials and any additional features, such as lighting or climbing plants, when calculating structural integrity. Sketch your design, noting dimensions and material specifications. This detailed plan will serve as your roadmap throughout the building process. A simple, clean-lined design best reflects contemporary style, minimizing unnecessary ornamentation.

    Building Your Cantilever Pergola: A Step-by-Step Guide

    With your plans finalized, it's time to assemble your pergola. Begin by preparing the foundation. This may involve securing robust posts to the ground using concrete footings or attaching the pergola directly to a sturdy existing wall. Ensure your base is level and secure. Next, carefully install the main support beams, ensuring they are perfectly aligned and securely fastened. This requires precision to maintain the structural integrity of the cantilever. This is where your planning pays off, making sure everything is exactly where it should be.

    Constructing the Cantilever Beams

    This is the heart of the project. Attach the cantilever beams to the main support structure. These beams will extend outward, providing the shaded overhang. Use high-quality fasteners and consider employing additional bracing for extra support, particularly with longer spans. Remember to account for the weight distribution of the beams and the added load of shade cloth or roofing materials if you choose to add them. Regularly check for level and squareness throughout the construction process to guarantee a visually pleasing and structurally sound outcome.

    Finishing Touches: Adding Personality and Protection

    Once the structural framework is complete, add the finishing touches. Consider attaching a shade cloth or pergola roofing material to filter sunlight while still allowing for airflow. Apply a protective sealant or stain to preserve the wood's beauty and extend its lifespan. Install LED lighting for ambient illumination in the evenings. Finally, personalize your pergola with comfortable seating, potted plants, or decorative accents to create a truly inviting outdoor haven.

    Maintaining Your Modern Masterpiece

    Proper maintenance will keep your DIY cantilever pergola looking stunning for years to come. Regularly inspect the structure for any signs of wear or damage. Tighten any loose fasteners and address any issues promptly. Periodically clean the structure to remove debris and prevent mold growth. Reapply sealant or stain as needed to protect the wood from the elements. With consistent care, your custom-built cantilever pergola will be a centerpiece of your outdoor living space for many seasons to come.

    Building a cantilever pergola is a rewarding DIY project. By following these steps and paying attention to detail, you can create a stunning focal point that enhances your outdoor living area with contemporary flair. So get started, and enjoy the process of building your personalized outdoor retreat!

    Continue reading
     

    Wood duck box Copyright © 2016 | Powered by Blogger