Creating a Cold Frame from Reclaimed Wood: A Step-by-Step Guide
Embrace the beauty and sustainability of reclaimed wood while boosting your gardening endeavors with a cold frame. This DIY project not only adds a touch of rustic charm to your yard but also provides a haven for your seedlings to thrive during colder months. Let's embark on this rewarding journey together!
Gathering Your Materials and Tools
Before you begin, gather the necessary materials and tools to ensure a smooth construction process. You'll need:
- Reclaimed wood boards (for the frame and lid)
- Hinges (for the lid)
- Screws or nails (for assembly)
- Glass or polycarbonate sheets (for the lid)
- Silicone sealant
- Measuring tape
- Saw (circular or hand saw)
- Drill (with appropriate bits)
- Level
- Safety glasses
- Gloves
Crafting the Cold Frame's Foundation
Defining the Dimensions
Decide on the dimensions of your cold frame, considering the size of your seedlings and the space available in your garden. A standard size is approximately 3 feet wide, 4 feet long, and 2 feet tall. Measure and cut the reclaimed wood boards to these dimensions using your saw.
Building the Frame
Using screws or nails, connect the wood boards to form a rectangular frame. Ensure that the corners are square and secure. If needed, use clamps to hold the pieces together while securing them. Position the frame on a level spot in your garden where it will receive adequate sunlight.
Constructing the Lid
Creating the Lid Frame
Repeat the process from the previous step to create a frame for the lid. This frame should be slightly smaller than the base frame to allow for a snug fit and easy opening and closing.
Attaching the Covering
Cut your glass or polycarbonate sheets to match the dimensions of the lid frame. Use silicone sealant to adhere the covering material to the lid frame, creating a waterproof seal. Allow the sealant to dry completely before proceeding.
Finishing Touches: Assembling and Securing the Lid
Attach the hinges to the lid frame and the base frame, ensuring smooth movement. You can choose from various types of hinges depending on your preference and design. Adjust the hinges for optimal opening and closing. Optional: If needed, add a handle to the lid for easy access.
Prepare Your Cold Frame for Planting
Fill the cold frame with a suitable potting mix or garden soil. Ensure proper drainage by adding a layer of gravel or rocks at the bottom. Plant your seedlings, leaving ample space for them to grow. Carefully close the lid and monitor your plants for their progress.
Enjoying the Rewards of Your Labor
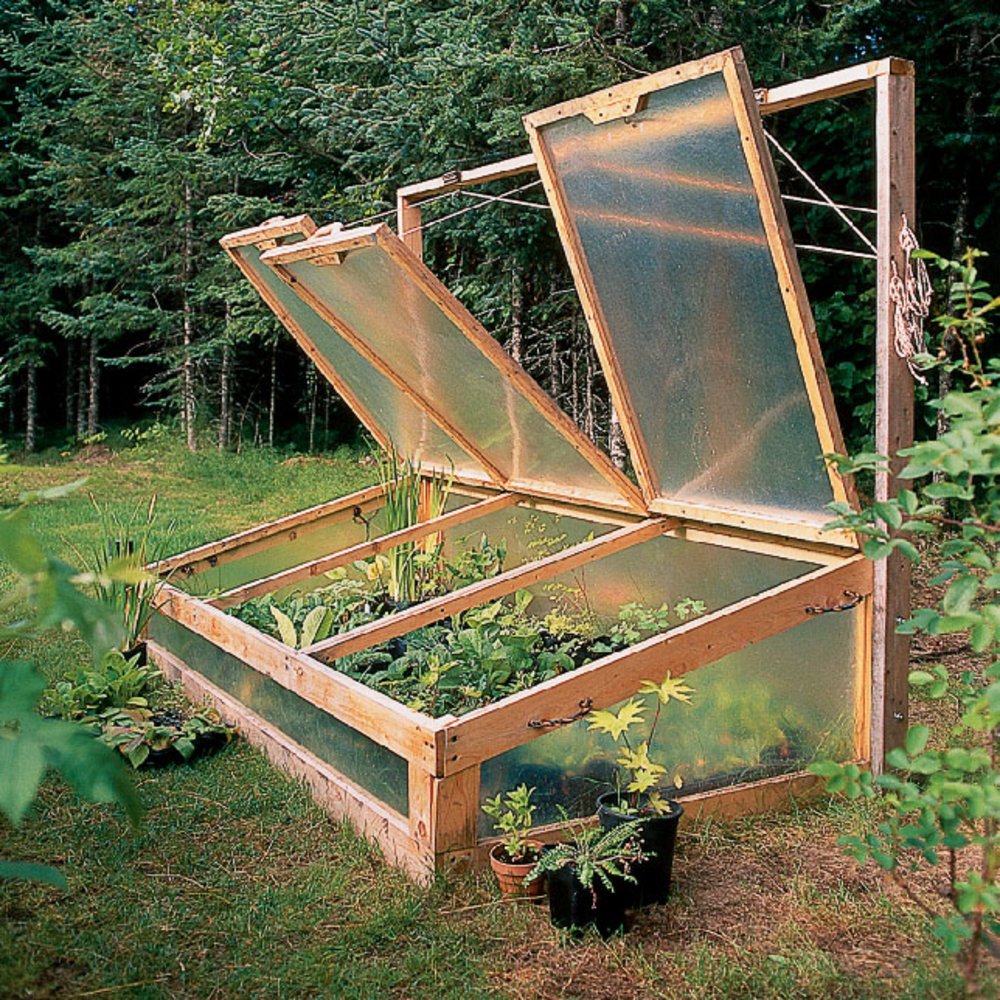
Your cold frame, crafted from reclaimed wood, now provides a protected environment for your seedlings to flourish. Enjoy the satisfaction of your DIY project and marvel at the growth of your plants as you nurture them through the colder months.
0 comments:
Post a Comment